Wow. It’s been a minute. Several minutes actually. Over a year since my last update. I bet you thought I bit off more than I could chew and gave up, right? No way. So what have I been doing then?
I took an even bigger bite!
I did get my project into a hangar at KTOA. If you’re local, come on by for a visit!
I also had the opportunity to go for a couple of rides in a friends Long EZ, and another friends Berkut; during which a few of things dawned on me.
1 – Tandem airplanes aren’t for me. Who wants the sit behind their co-pilot, or vice versa? Aviation is just as much about the experience as it is the destination. For me, the experience is richened by sitting NEXT to your buddy, not behind or in front. I get it, it’s more aerodynamic, it’s less material, it’s smaller and lighter. The engineer in me understands all of these points. I just don’t care.
2 – Kaylee roasts under bubble canopies. I’m super fair skinned. The SoCal sun is super hot. I need some shaaadddeee.
3 – The canard is a fascinating airplane and I definitely want to get my project back in the air. I was more motivated than ever after my ridealongs!
After digesting my demo flights, I did some day dreaming, a little soul searching, quite a bit more day dreaming… Then dove into CAD. This is what I dreamed up.
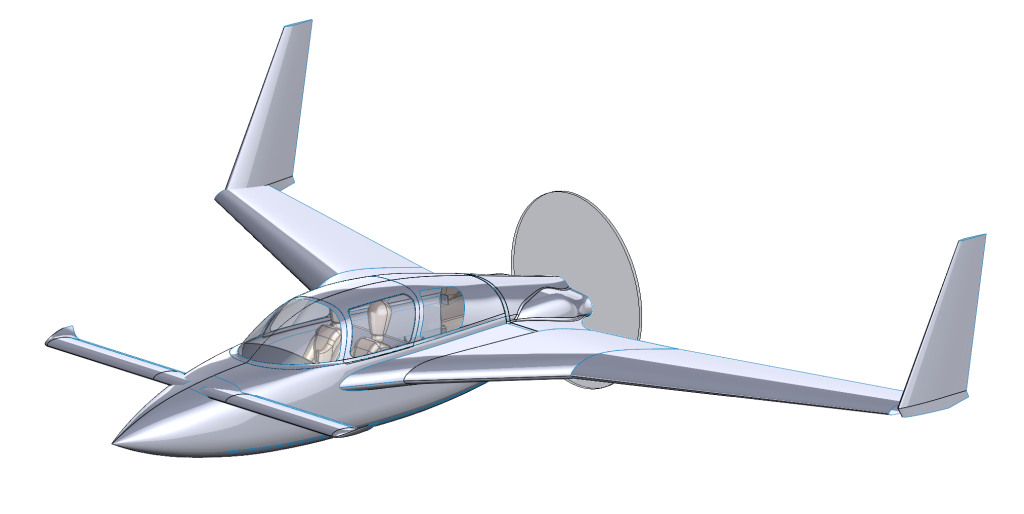
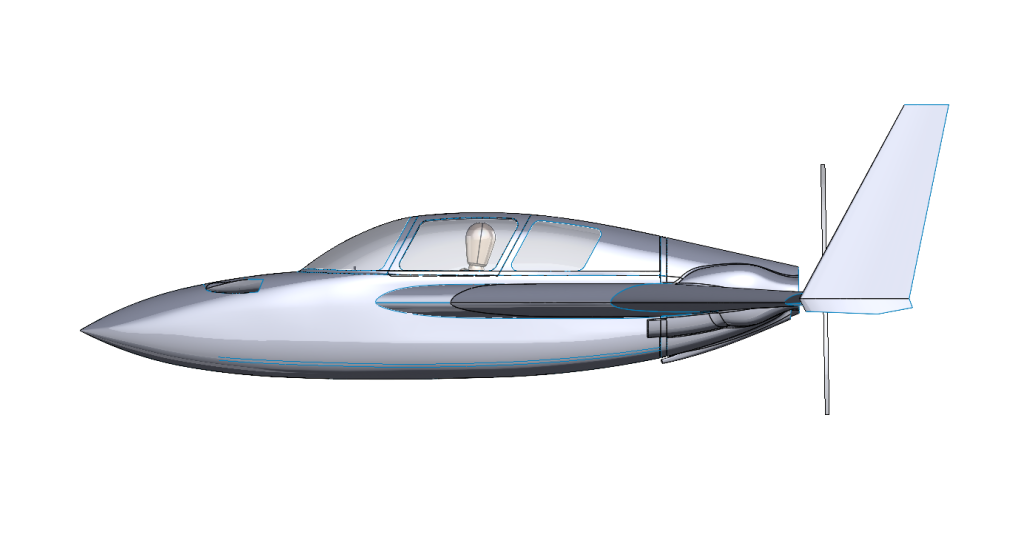
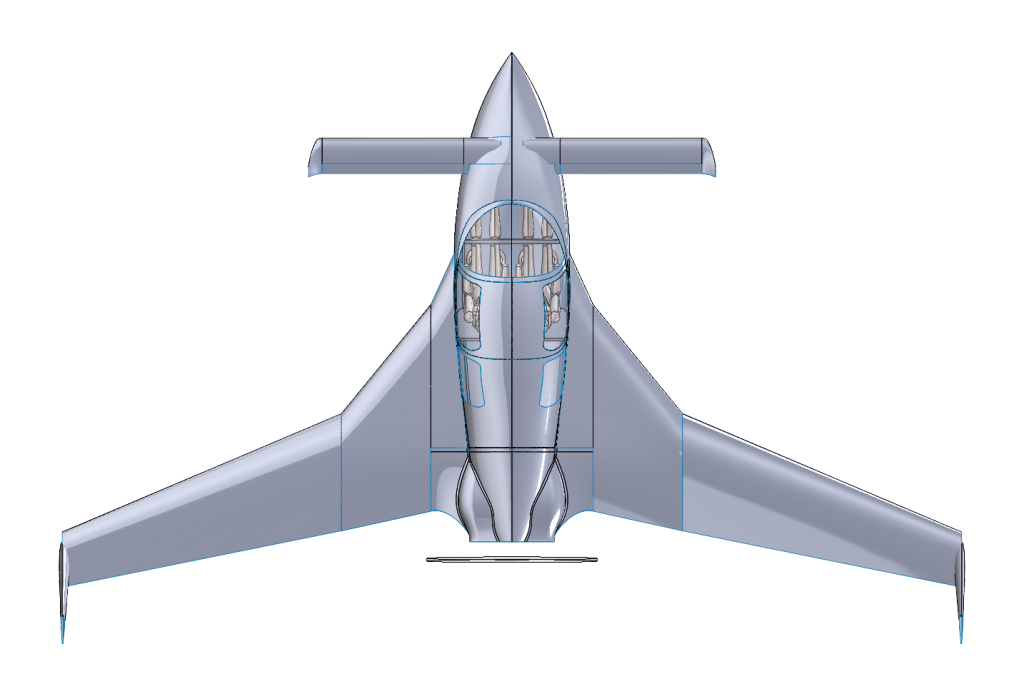
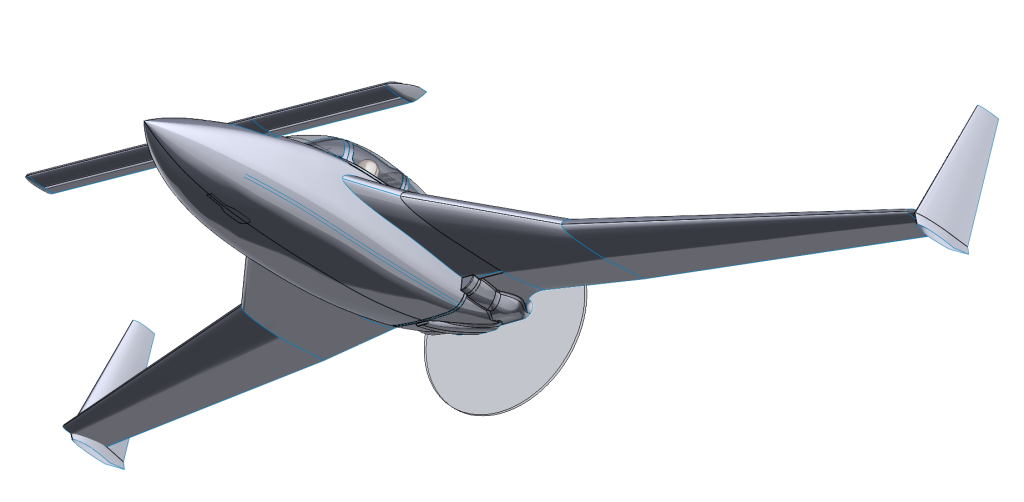
She’s a 2 place with side by side seating, retractable gear and a sliding canopy. IO-360 powered. She’ll use my Long EZ wings. The design is most similar to a Cozy III in that respect. It differs from a Cozy, however, in the construction. Instead of long 2D sides bent around a profile with the corners rounded off, it’s a true lofted surface. This makes it more visually appealing, to my eyes anyway (Cozy’s are pretty too, though!) It also means you’re not going to just bend some flat pieces of Divinycell over a template and have a fuselage side. We need molds.
Molds? Wow, Kaylee. This sounds like kind of a big project now.
Welllllll. Yes. And also no. But mostly yes. I have an idea though…
What if, and hear me out.. What if I had a giant CNC machine that could just cut my shape out of foam. Then I could just pull molds off that shape. That would be pretty quick, right? Sure! In fact, this is how I manufacture tools for one of my clients. We use some high density tooling board and their big 4 axis CNC gantry mill to CNC machine bucks slightly undersized. We then coat the bucks with a surfacer/sealer, and re-machine them to the exact OML (Outer Mold Line). A little bit of sanding and polishing and the buck is ready to pull molds from. So now I bet you’re saying. “That sounds great and all, but I bet they have an entire aerospace engineering facility. How are you going to do this in your humble little hangar?”
Wellllll. I’m going to build my own CNC Machine.
When I decided I was going to build a clean sheet molded design, I realized I was signing myself up for at least 1,000 hours of sanding. I hate sanding. I really enjoy doing layups, but I really hate sanding. Herein lies the beauty of the CNC machine. I can spend a few months (it actually took 9) and a couple hundred hours (it actually took 450 hours) building a CNC machine, which can then do all the shaping in 12 hours. Yes. 12 hours. Plus, when I’m all done. I have a giant CNC machine to play with.

Umm. So how do you just, build a CNC machine?
You start with some 13 foot long tubes.
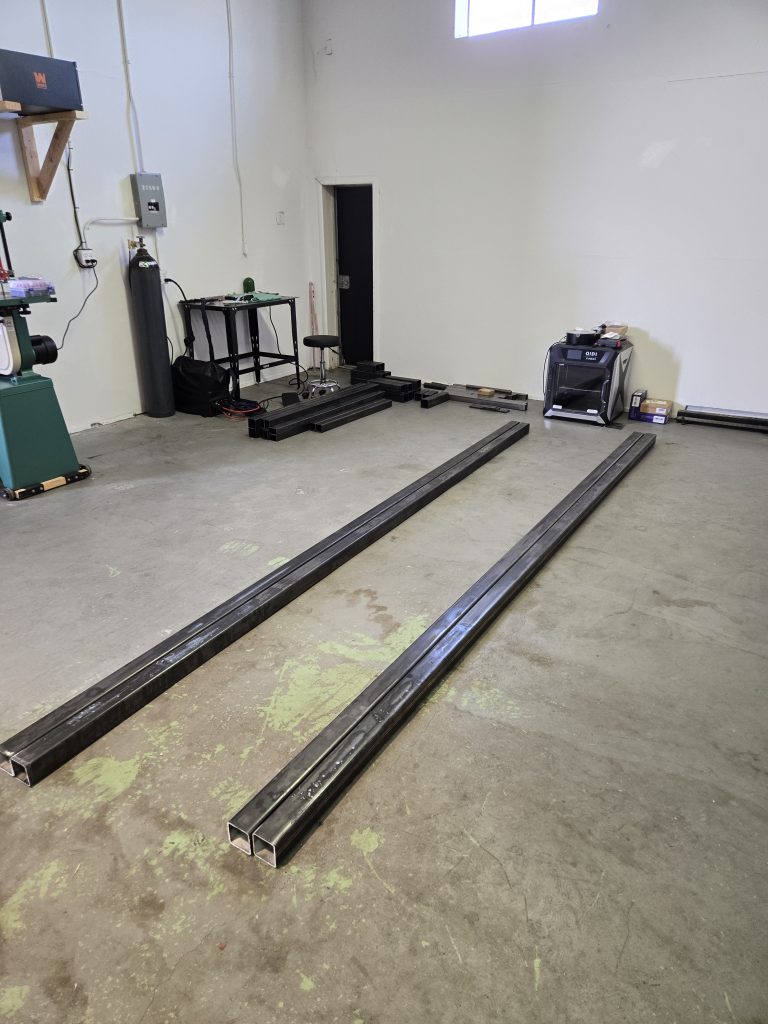
Then turn them into 13 foot long rectangles.

Then connect the rectangles to make a frame.
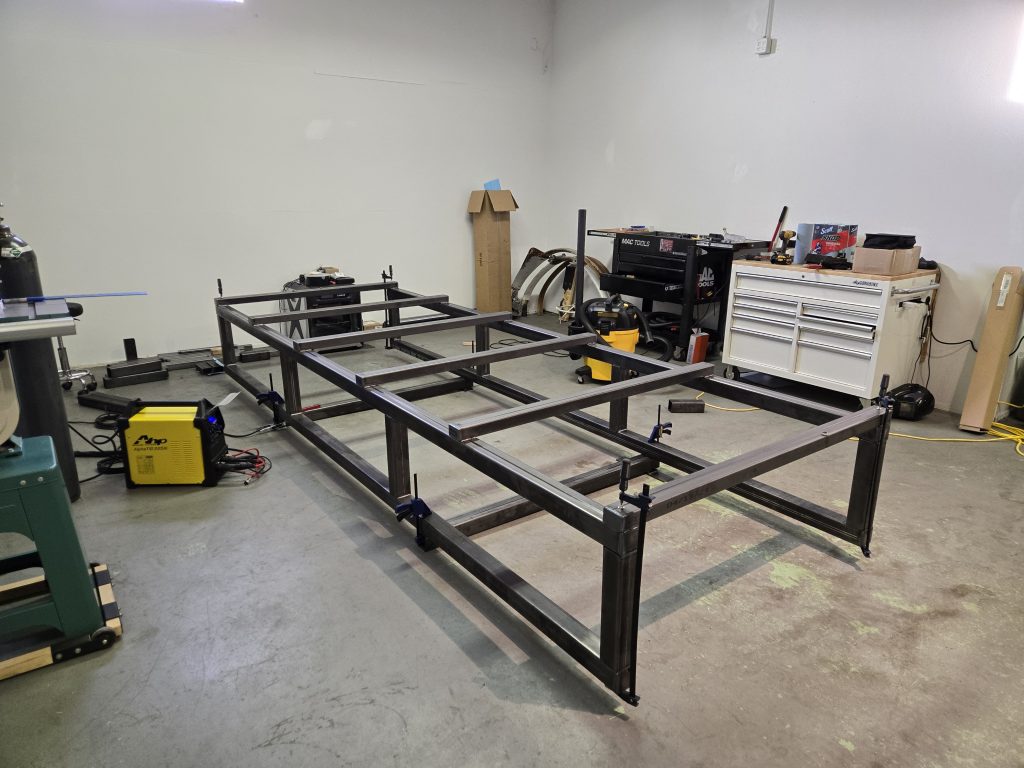
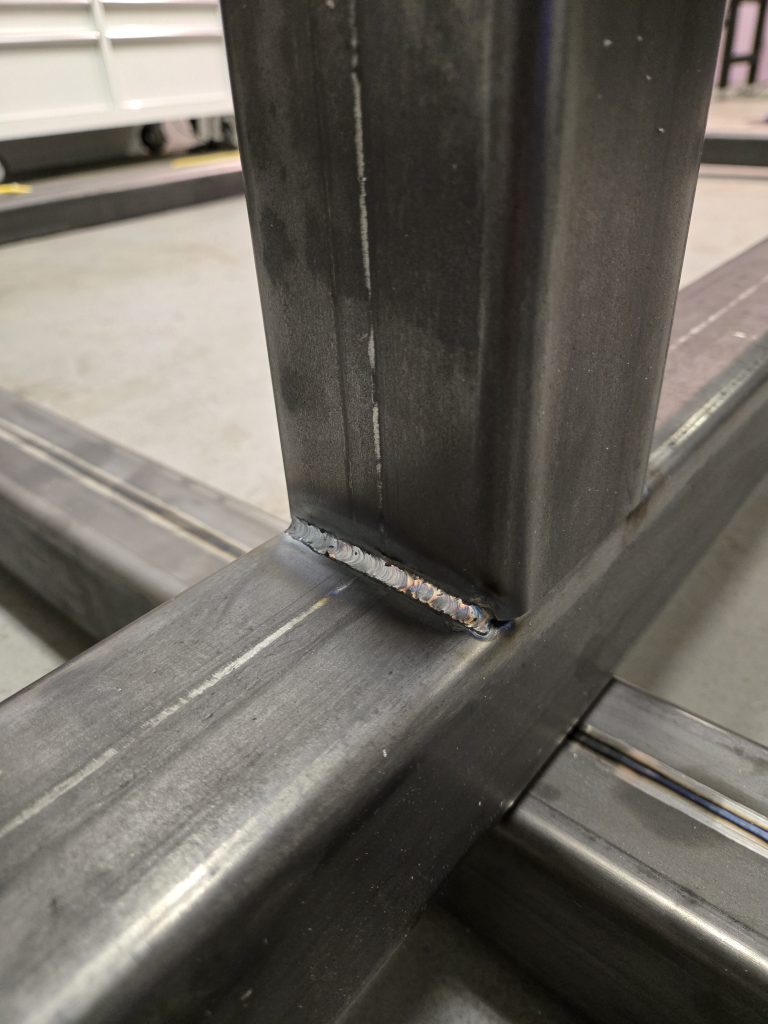
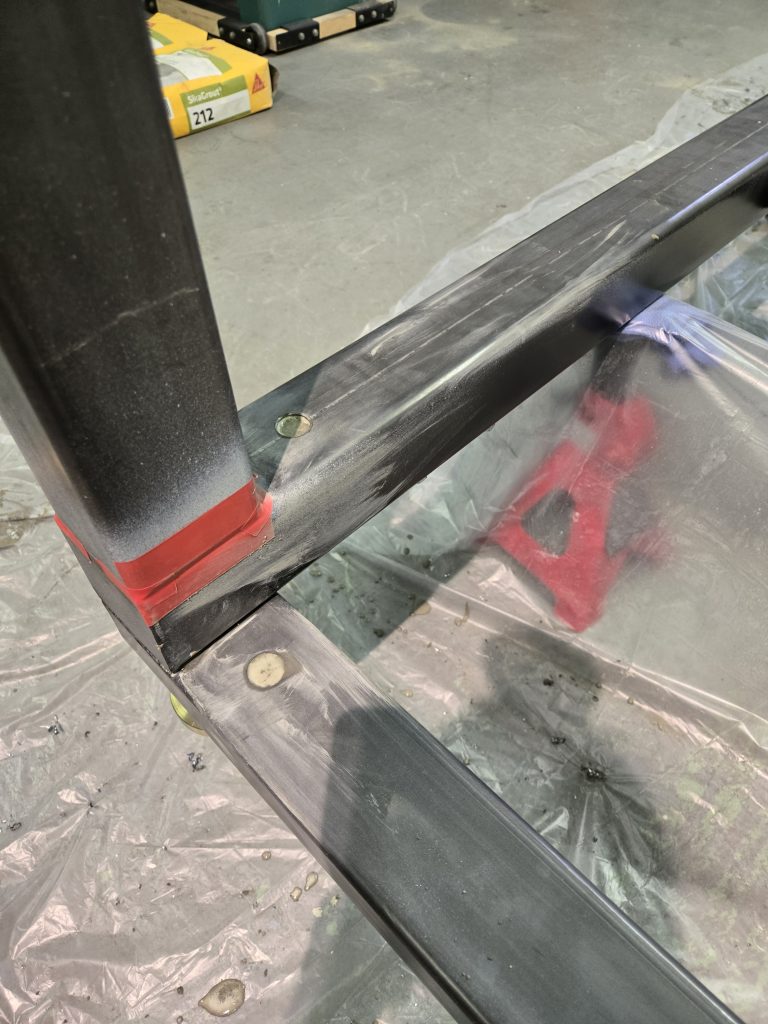
You try to make nice welds.
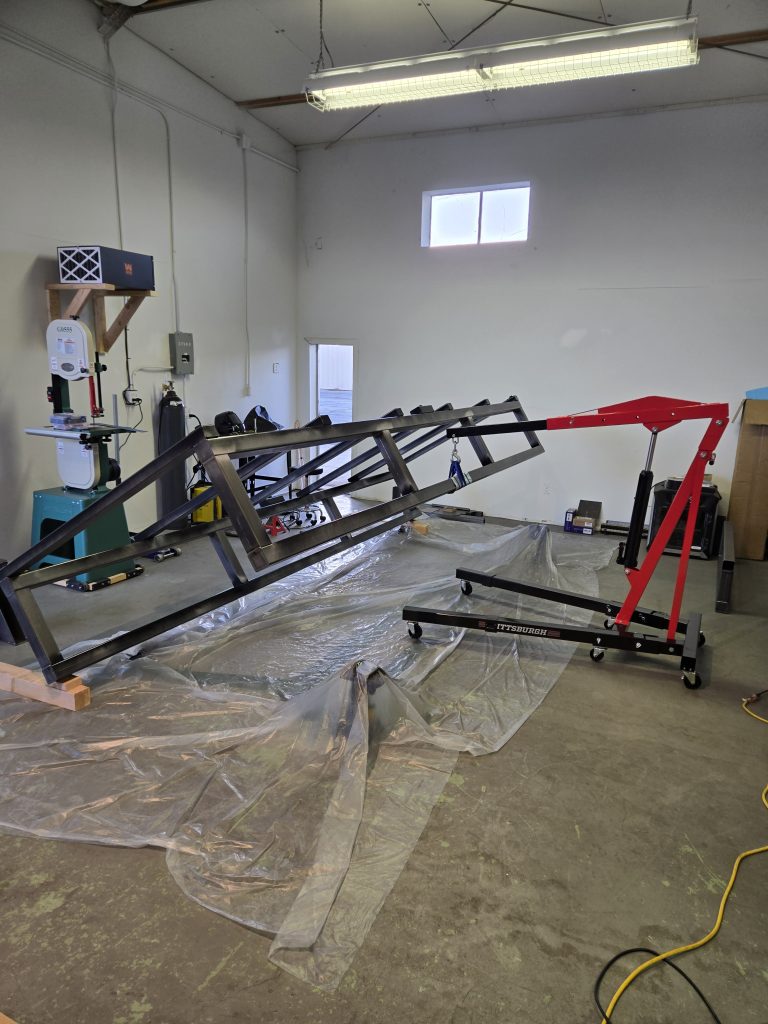
Rollllllll it over!
Then fill all the tubes with ~800 pounds of non-shrink precision grout. This was undoubtedly the hardest part of the project. My back still hurts.
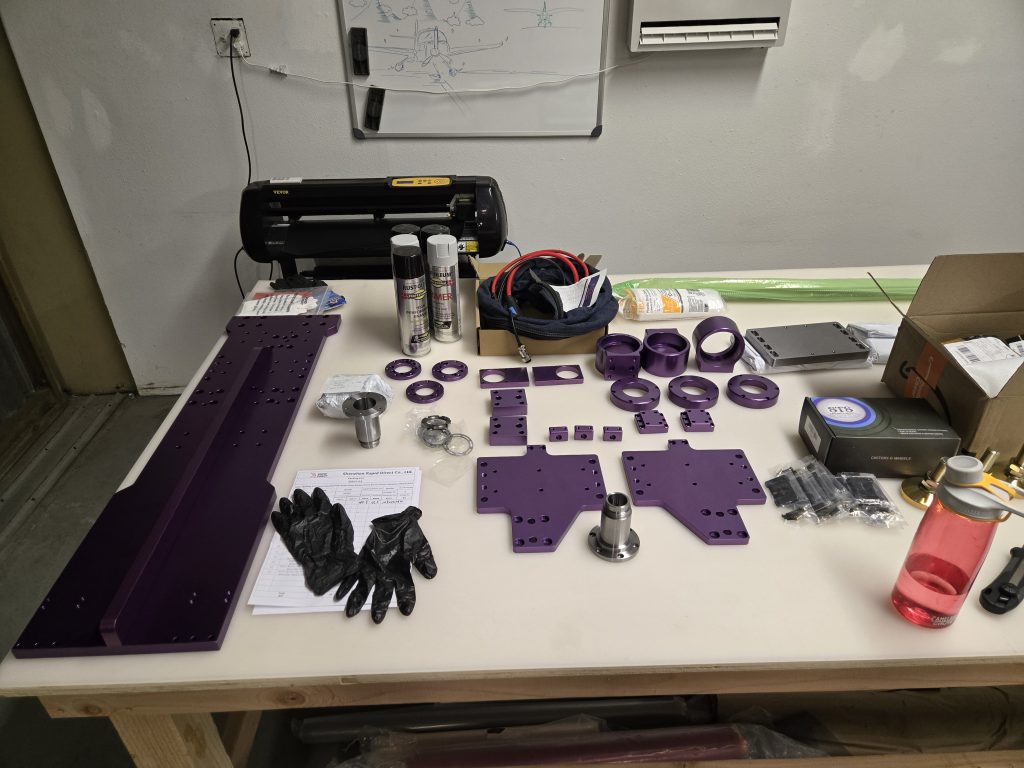
I designed some of the parts to be CNC machined rather than fabricated and welded.
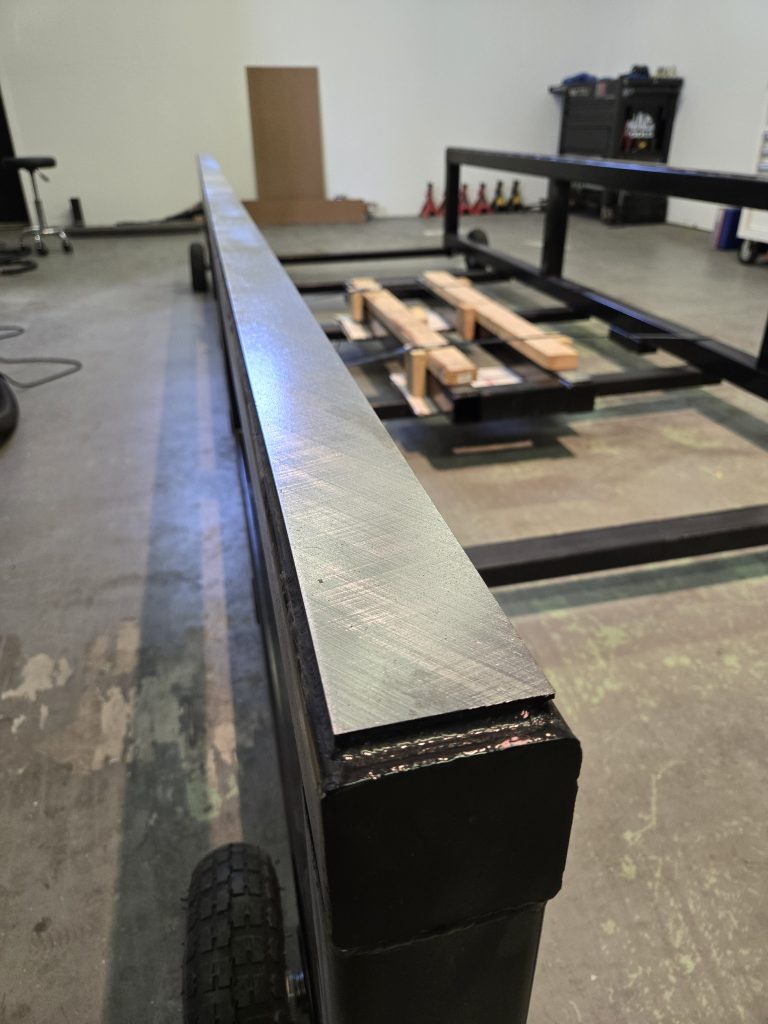
I then stitch welded on some 3/8″ cap strips. The entire assembly warped due to weld draw, and needed to be blanchard ground flat. The cap strips gave the grinders plenty of material to work with.
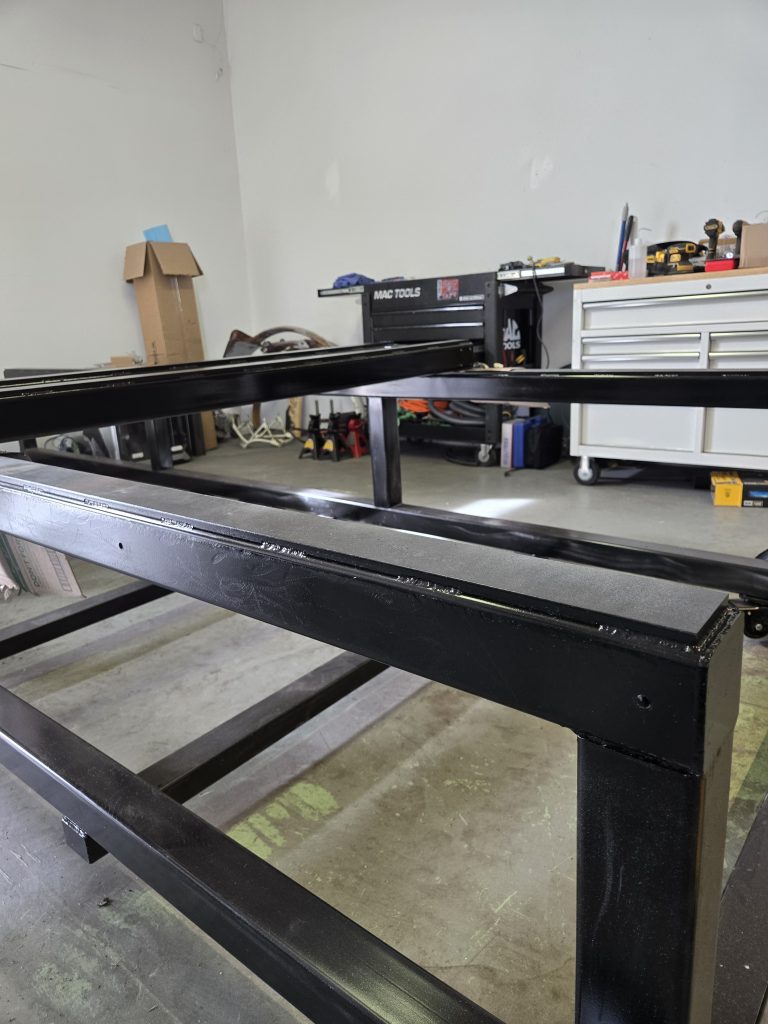
Nice and flat now!
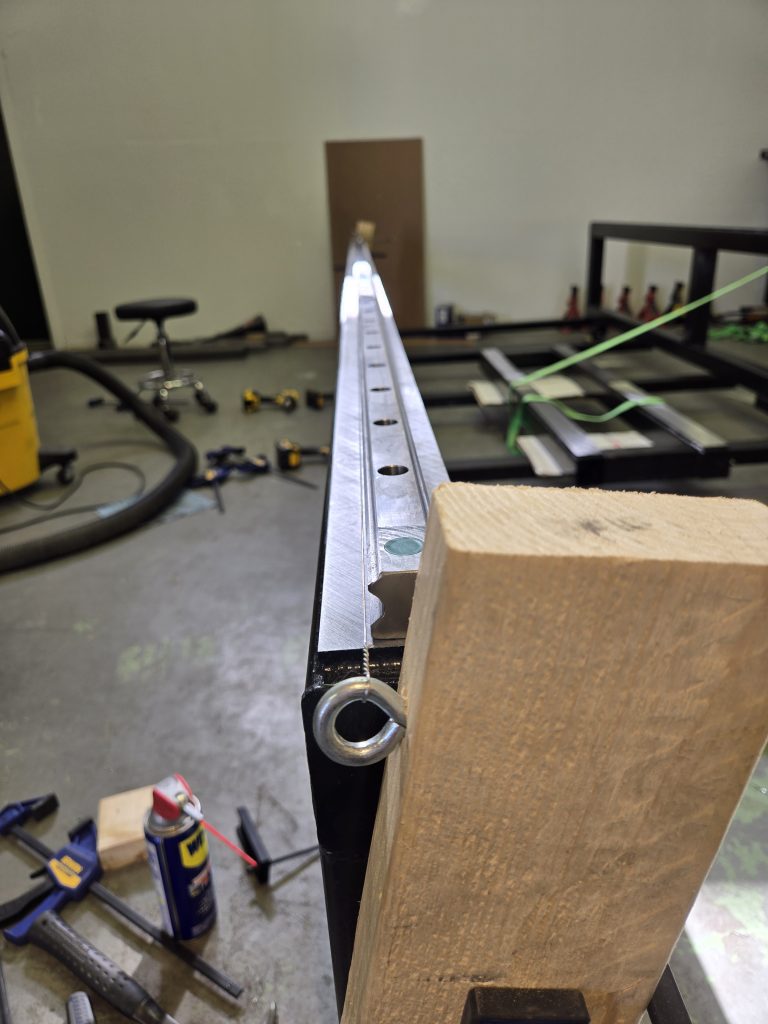
Then I drilled and tapped hundreds of holes for the 30mm linear rails. So. Many. Holes. But hey, I only broke 1 tap! I strung a piece of safety wire very taught down the rail to serve as a straight edge for rail alignment.
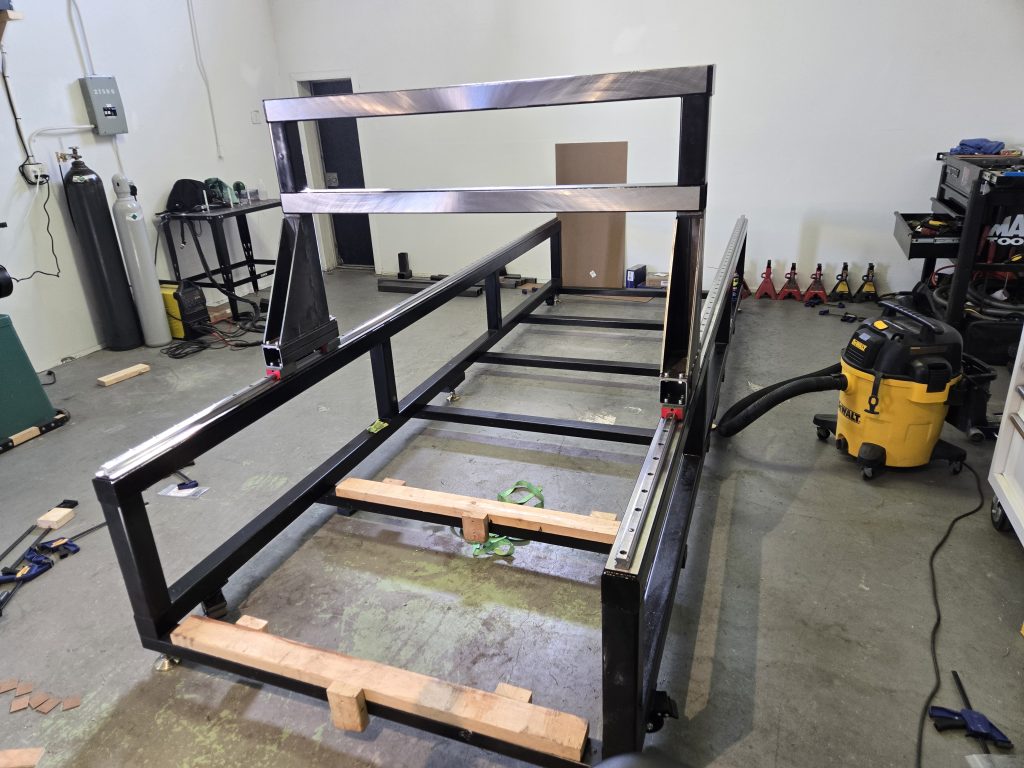
Welded up some risers and mocked up the gantry.
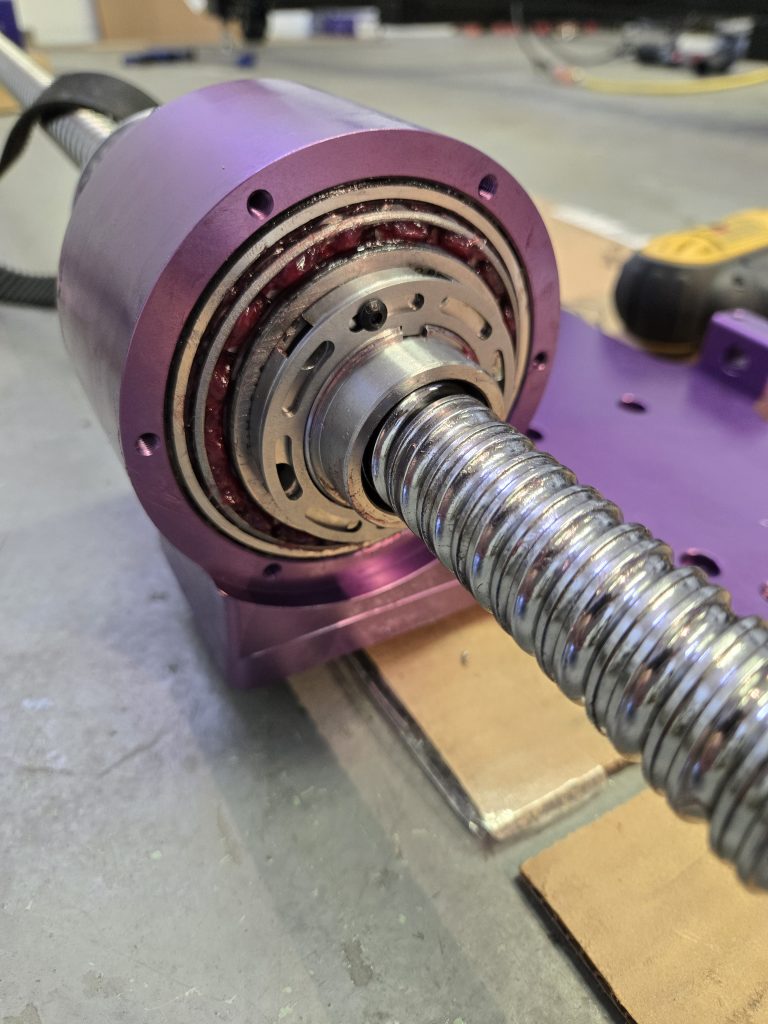
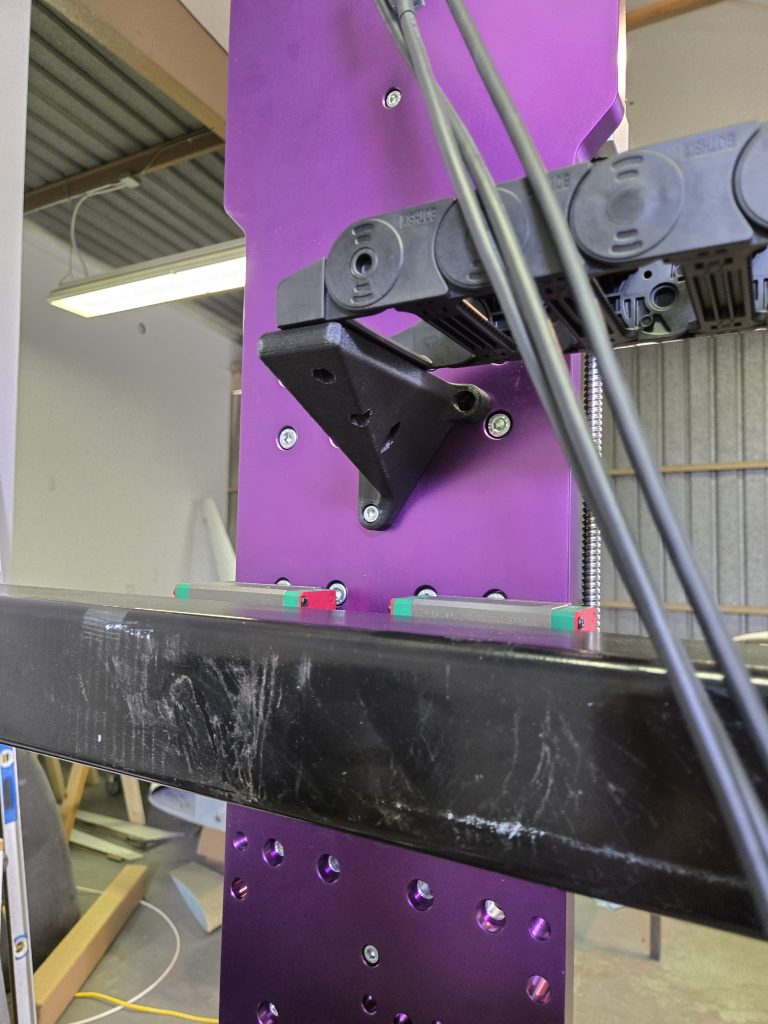
Close up shot of the custom rotating ballnut mechanism. A 13 foot ballscrew is too long to spin at any meaningful RPM without whipping, so I chose to rotate the ballnut instead! It uses 2 tapered roller bearings, with a locking nut all in a sealed housing.
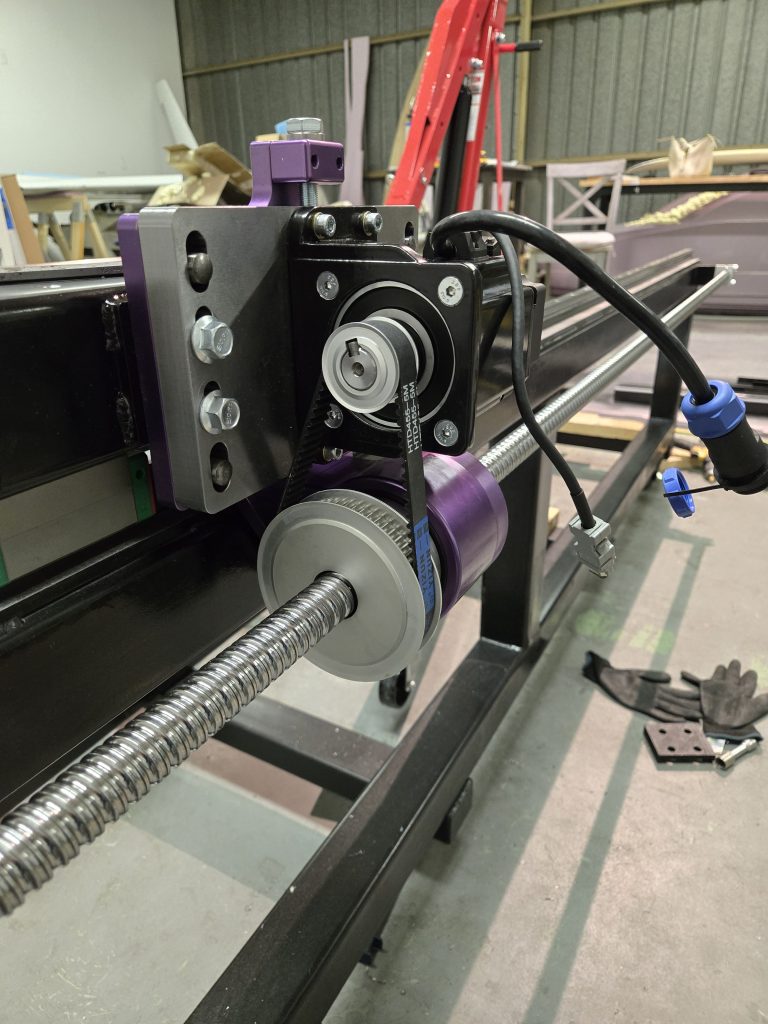
Here’s the rotating ballnut assembly, belt drive, and servo mocked up. The belt tension is set by the jack screw on top, then the 4 flange head bolts are locked down.
Mimi approves.
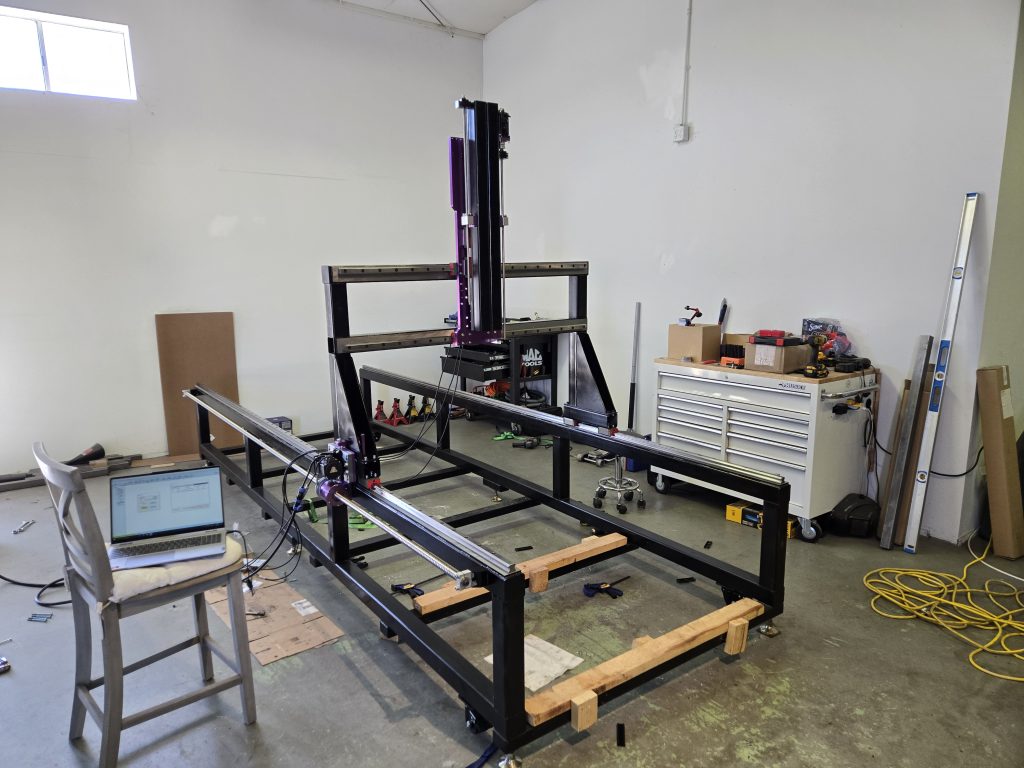
Starting to resemble a CNC machine.
Added some drag chain for wire management. There will be a lot of wires.
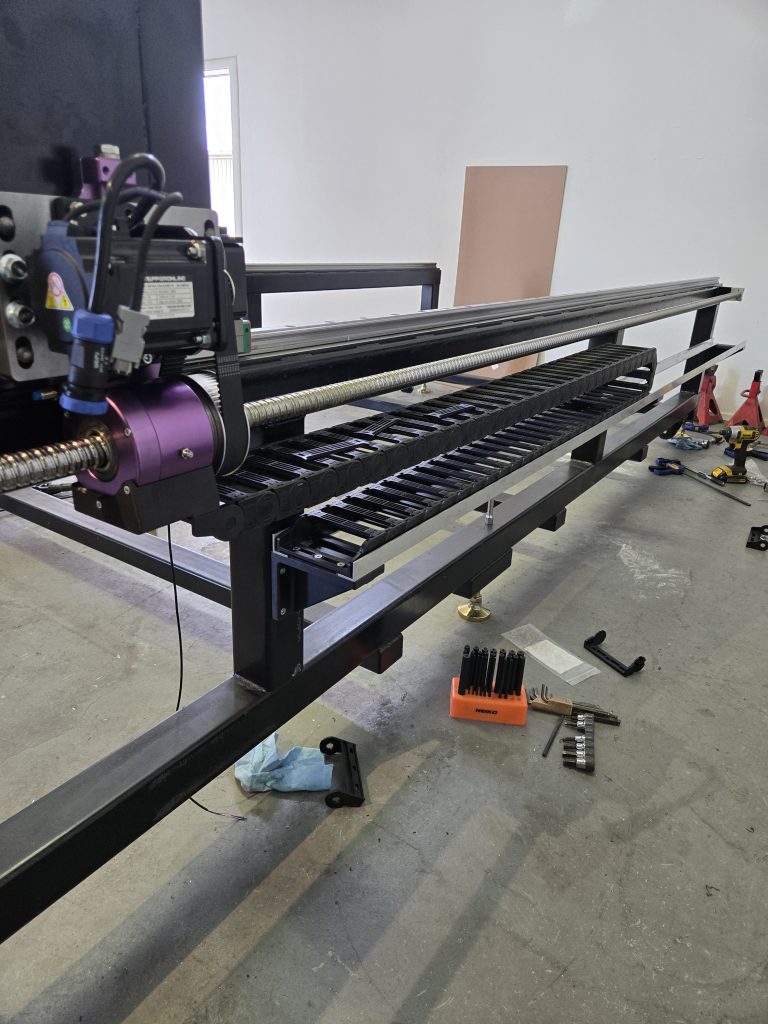
The X axis drag chain mount.
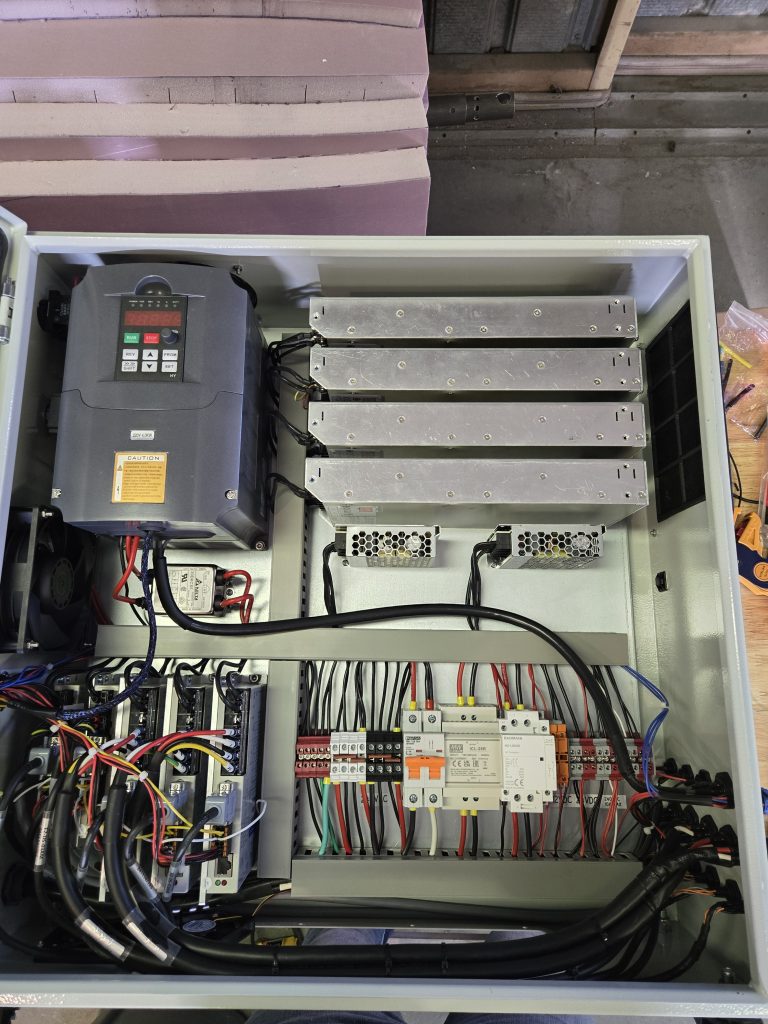
Then built the CNC control cabinet. This houses the VFD, line filter, 4 servo power supplies, 12VDC and 24VDC power supplies, 5 servo drives, a start up current limiting device, breakers, contactor, fuses, start and stop switch, and an emergency stop switch. Plus some fans to keep it all cool. Whew!
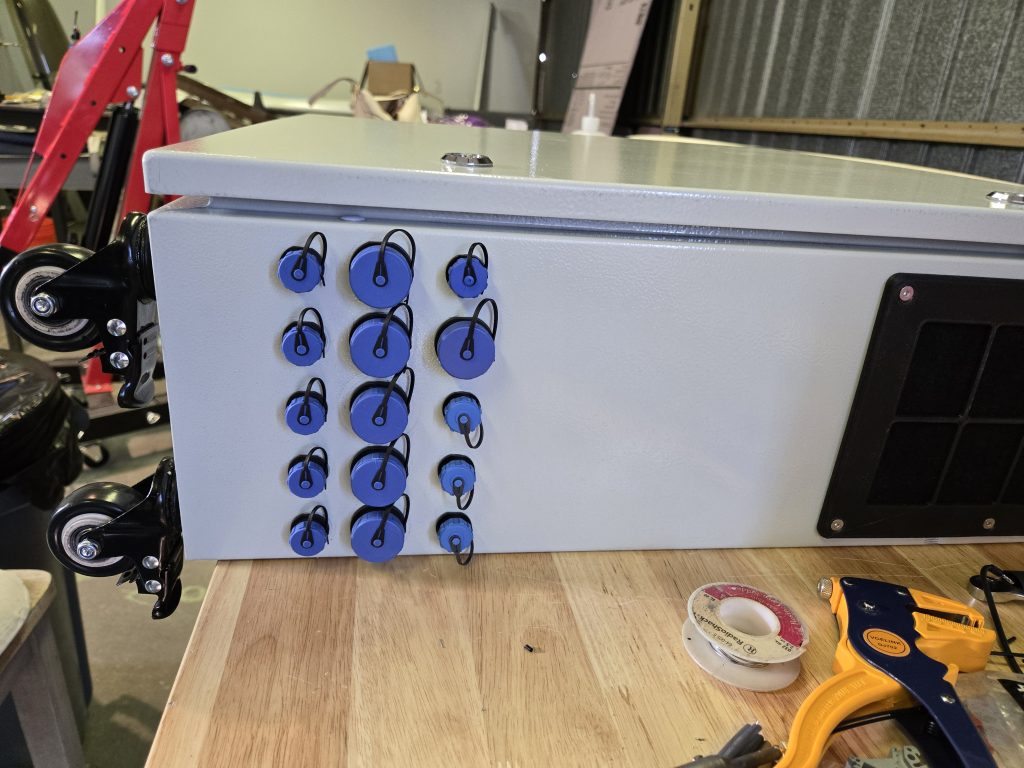
Lot’s of connectors on the outside
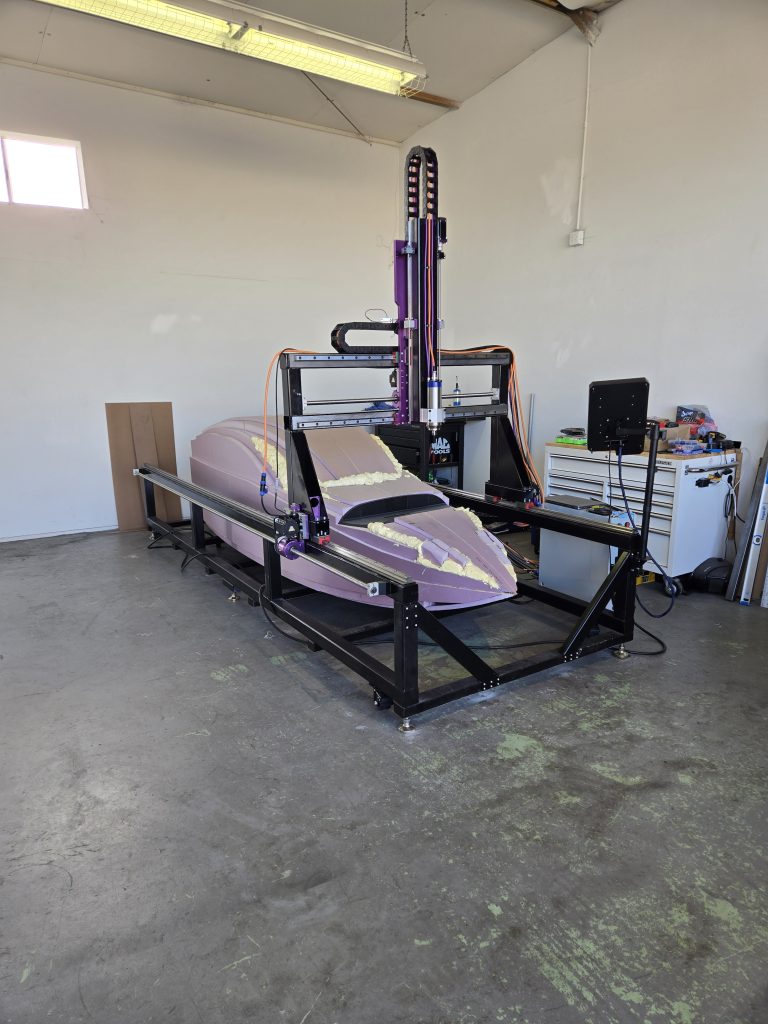
After alllllll that work. I have an airplane shaped piece of foam sitting in my CNC machine ready to be shaped. The machine is not quite finished here. I still had to install the 2nd Z axis servo, the limit switches, and had some cable management to do. But I couldn’t resist the photo op!
Finally. The first roughing cuts…
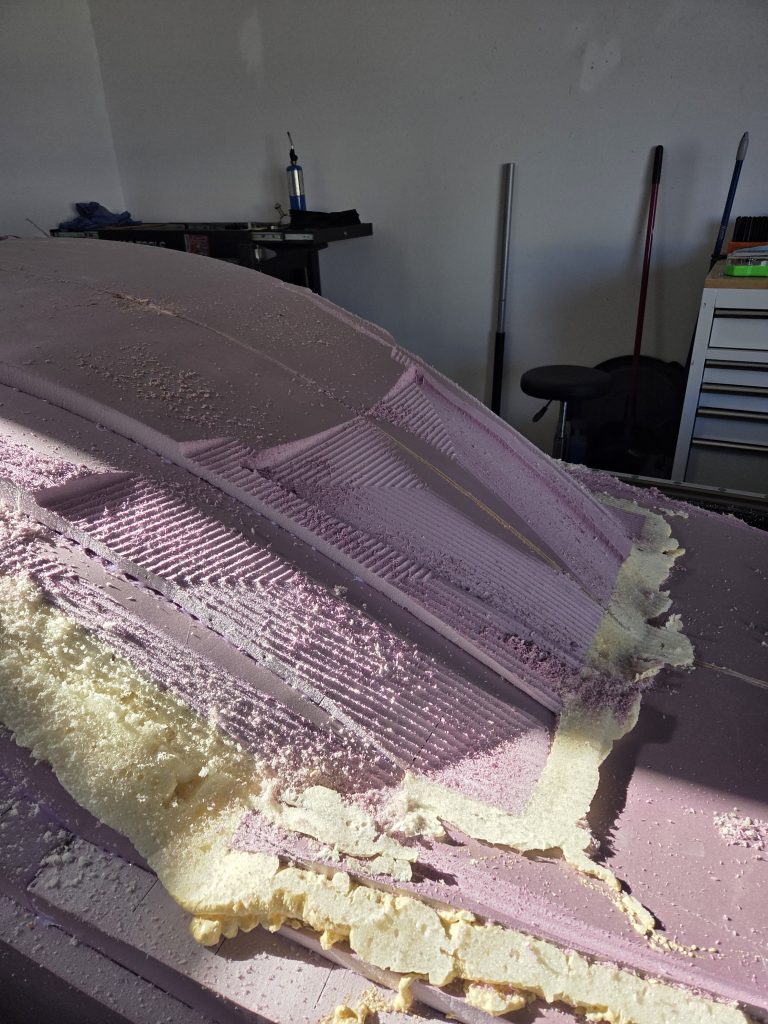
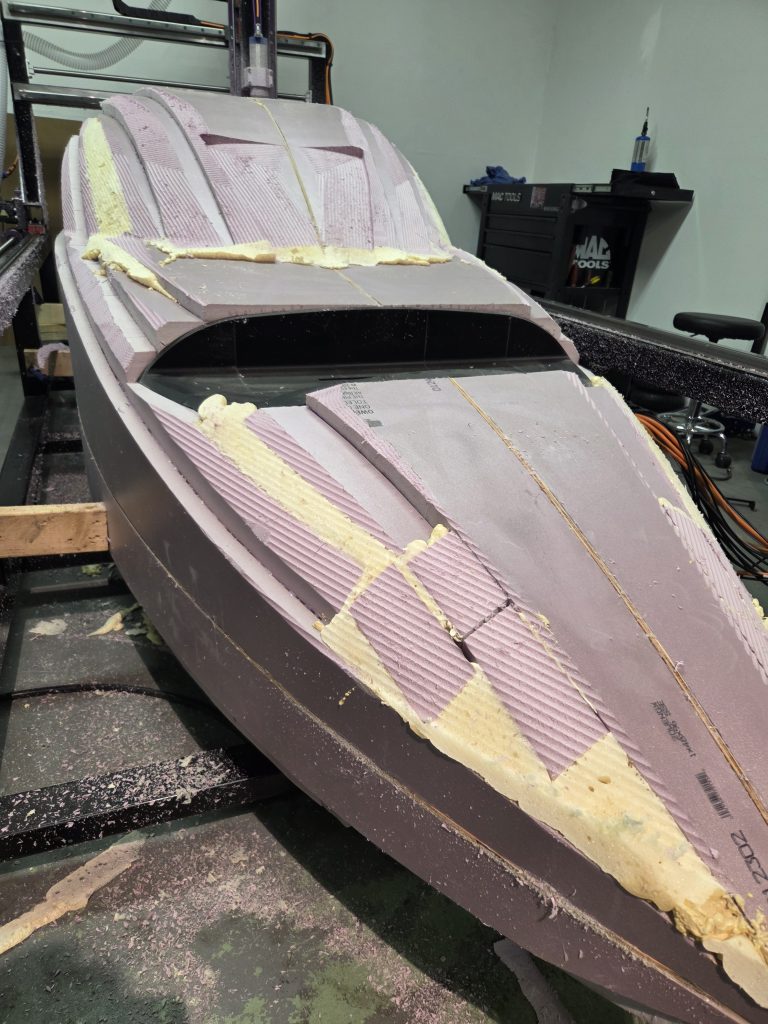
The foam fully roughed (with a few drywall mud patches).
Starting the finish pass with finer stepovers!
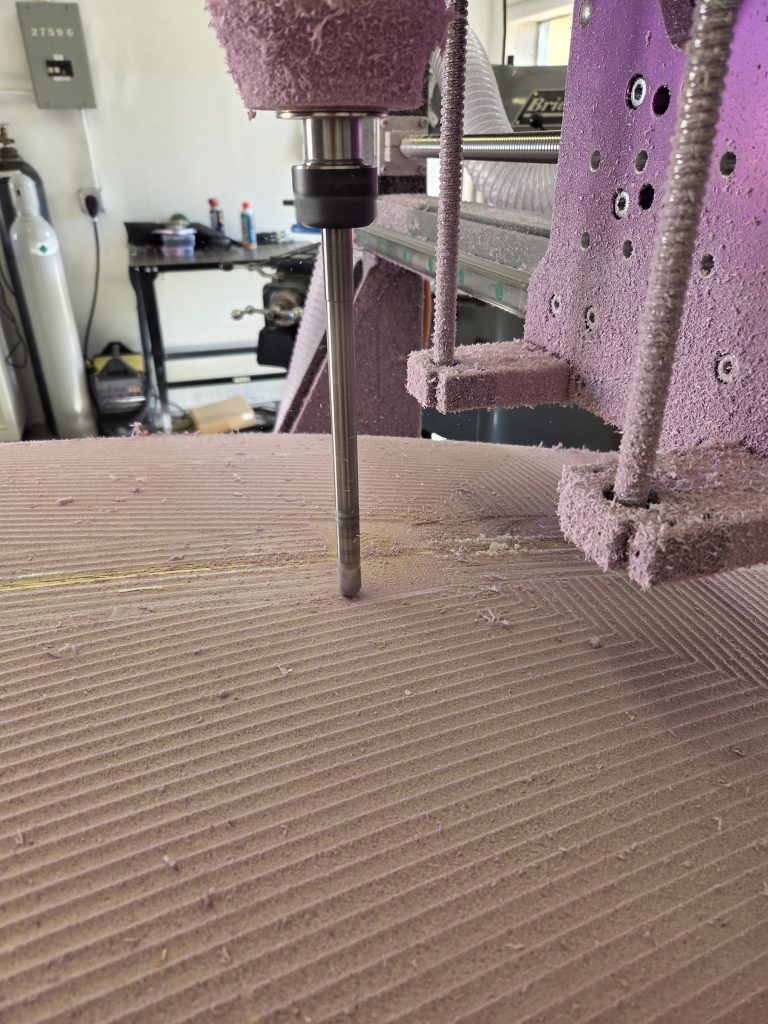
The CNC controller doing its thing during the finish pass.
This represents a solid 9 months of work. This is one of the more ambitious projects I’ve ever taken on. I feel incredibly accomplished watching it all come together and culminating in the first cuts last week.
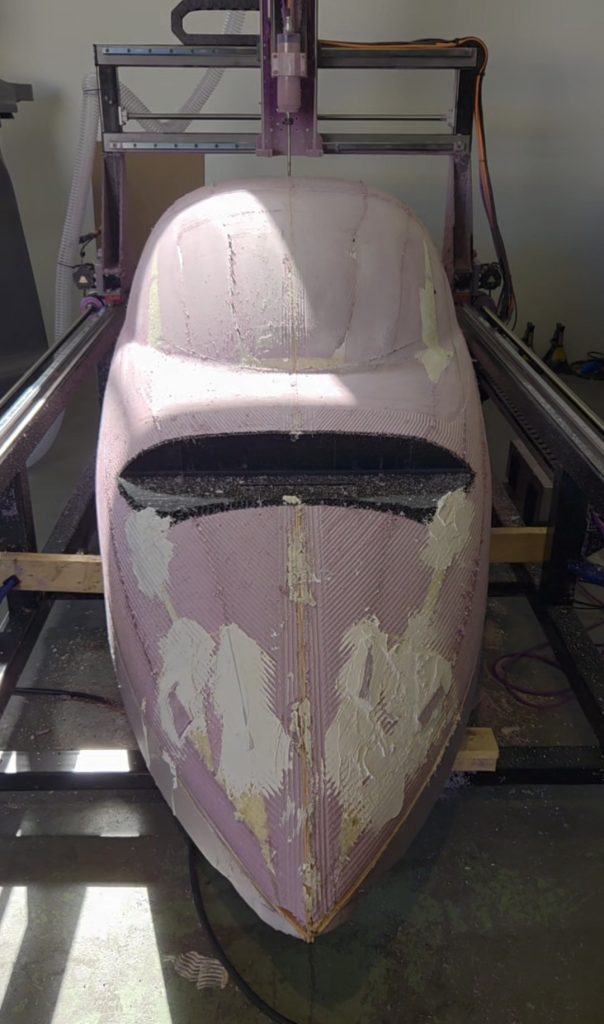
The top of the fuselage buck is now fully machined. Next I will layup several layers of fiberglass, then coat it with an epoxy surfacing sealer. Once cured, I’ll re-machine the surface to the final dimension. This will leave me with a hard surface ready to pull molds from.
There were several moments during the CNC build where I wondered if I did, in fact, bite off more than I could chew. But I took a deep breath, took a break, came back with a fresh head and just kept tackling the smaller individual projects.
I finally ate the elephant, one bite at a time.
Leave a Reply to Ben Cancel reply